Kitchen Island Makeover

When we bought our house, we had great dreams of re-doing the kitchen. The layout is great, it doesn’t need to be any bigger, we just wanted it to have nicer cabinets and newer countertops and new ovens and stove. Well, as happens often in our household, life just kept plugging along and before you know it we had lived here for over 10 years and nothing had changed in the kitchen. It’s one of those things where you say to yourself, let’s just get a new stove, but if you get a new stove, the vent hood will look outdated, so you would need a new vent hood, so you do nothing. Or you want to get a double oven from this century, but then you realize that the brick walls surrounding the double oven have an opening so small that they wont even fit any ovens that were made this century, so you do nothing. Or you decide to just get some new hardware for your cabinets and drawers, but then you realize the holes are spaced at such as distance that you cannot find any other hardware in the world that fits the holes and decide then you would need to drill new holes and patch and refinish the fronts, so you think it would be easier to get new door and drawer fronts but that seems major, so you do nothing. So then you think about just getting new countertops to bring the kitchen up to date but then think that may just be putting lipstick on a pig, so you do nothing.
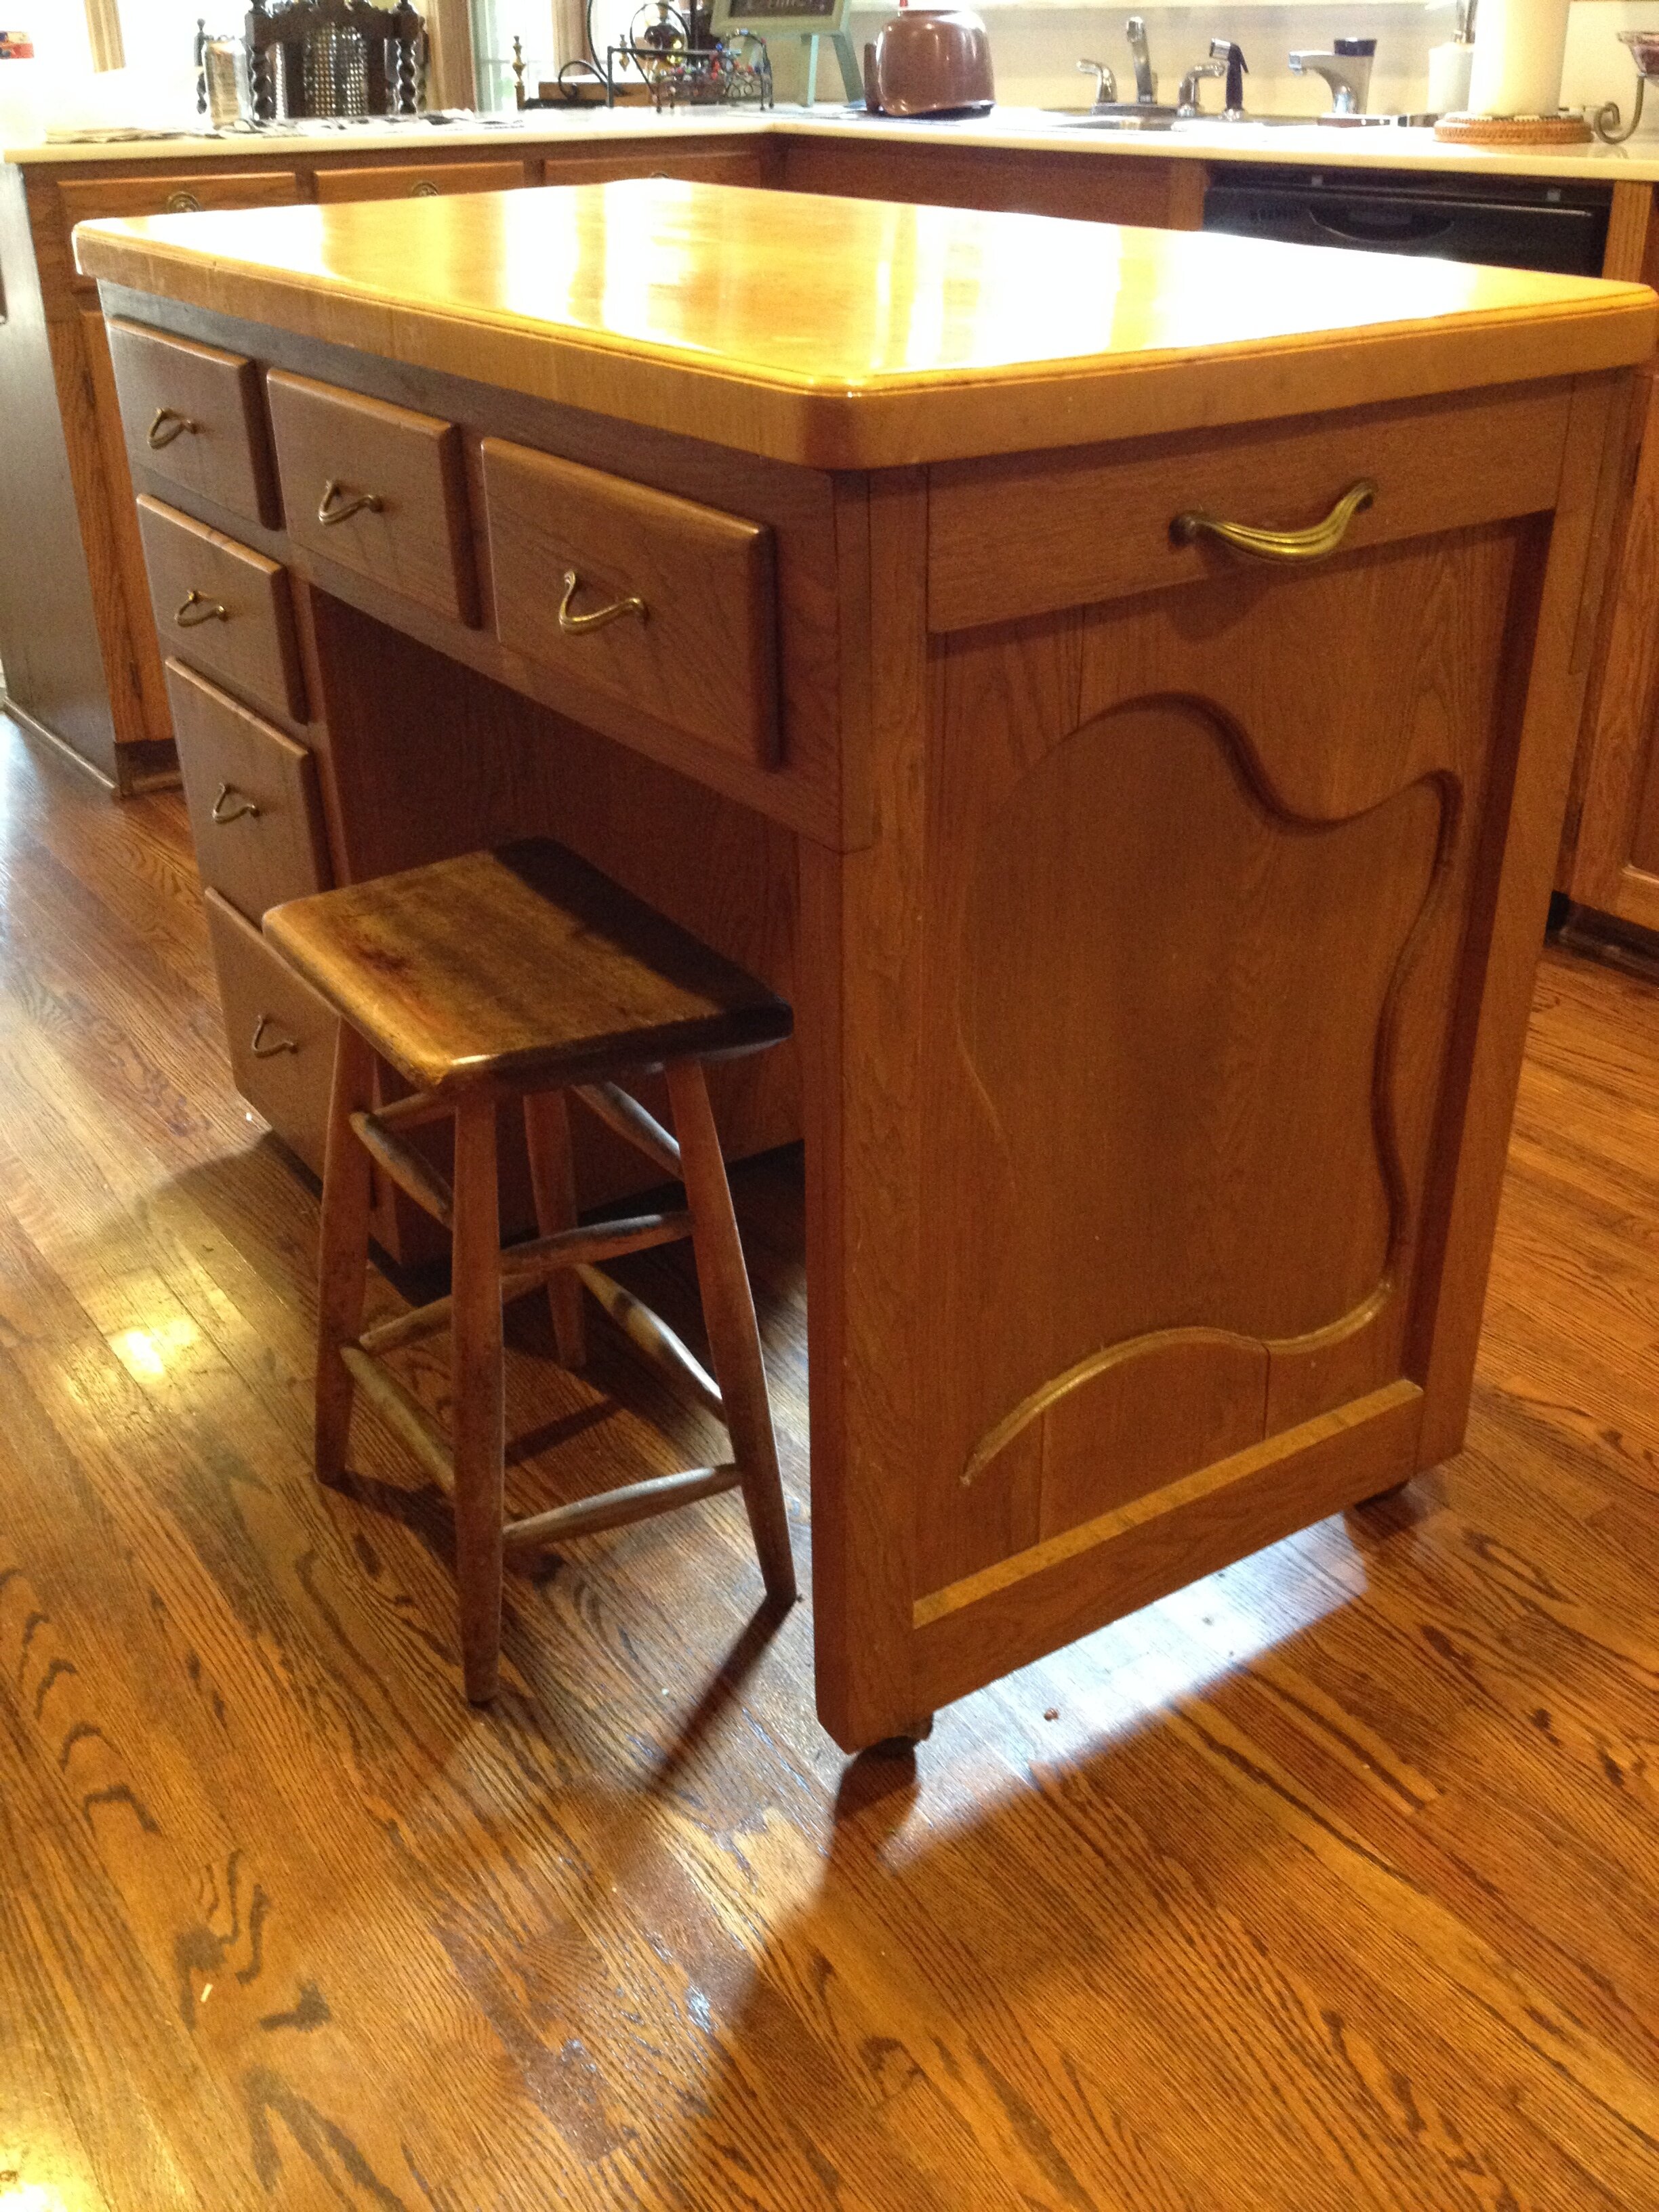
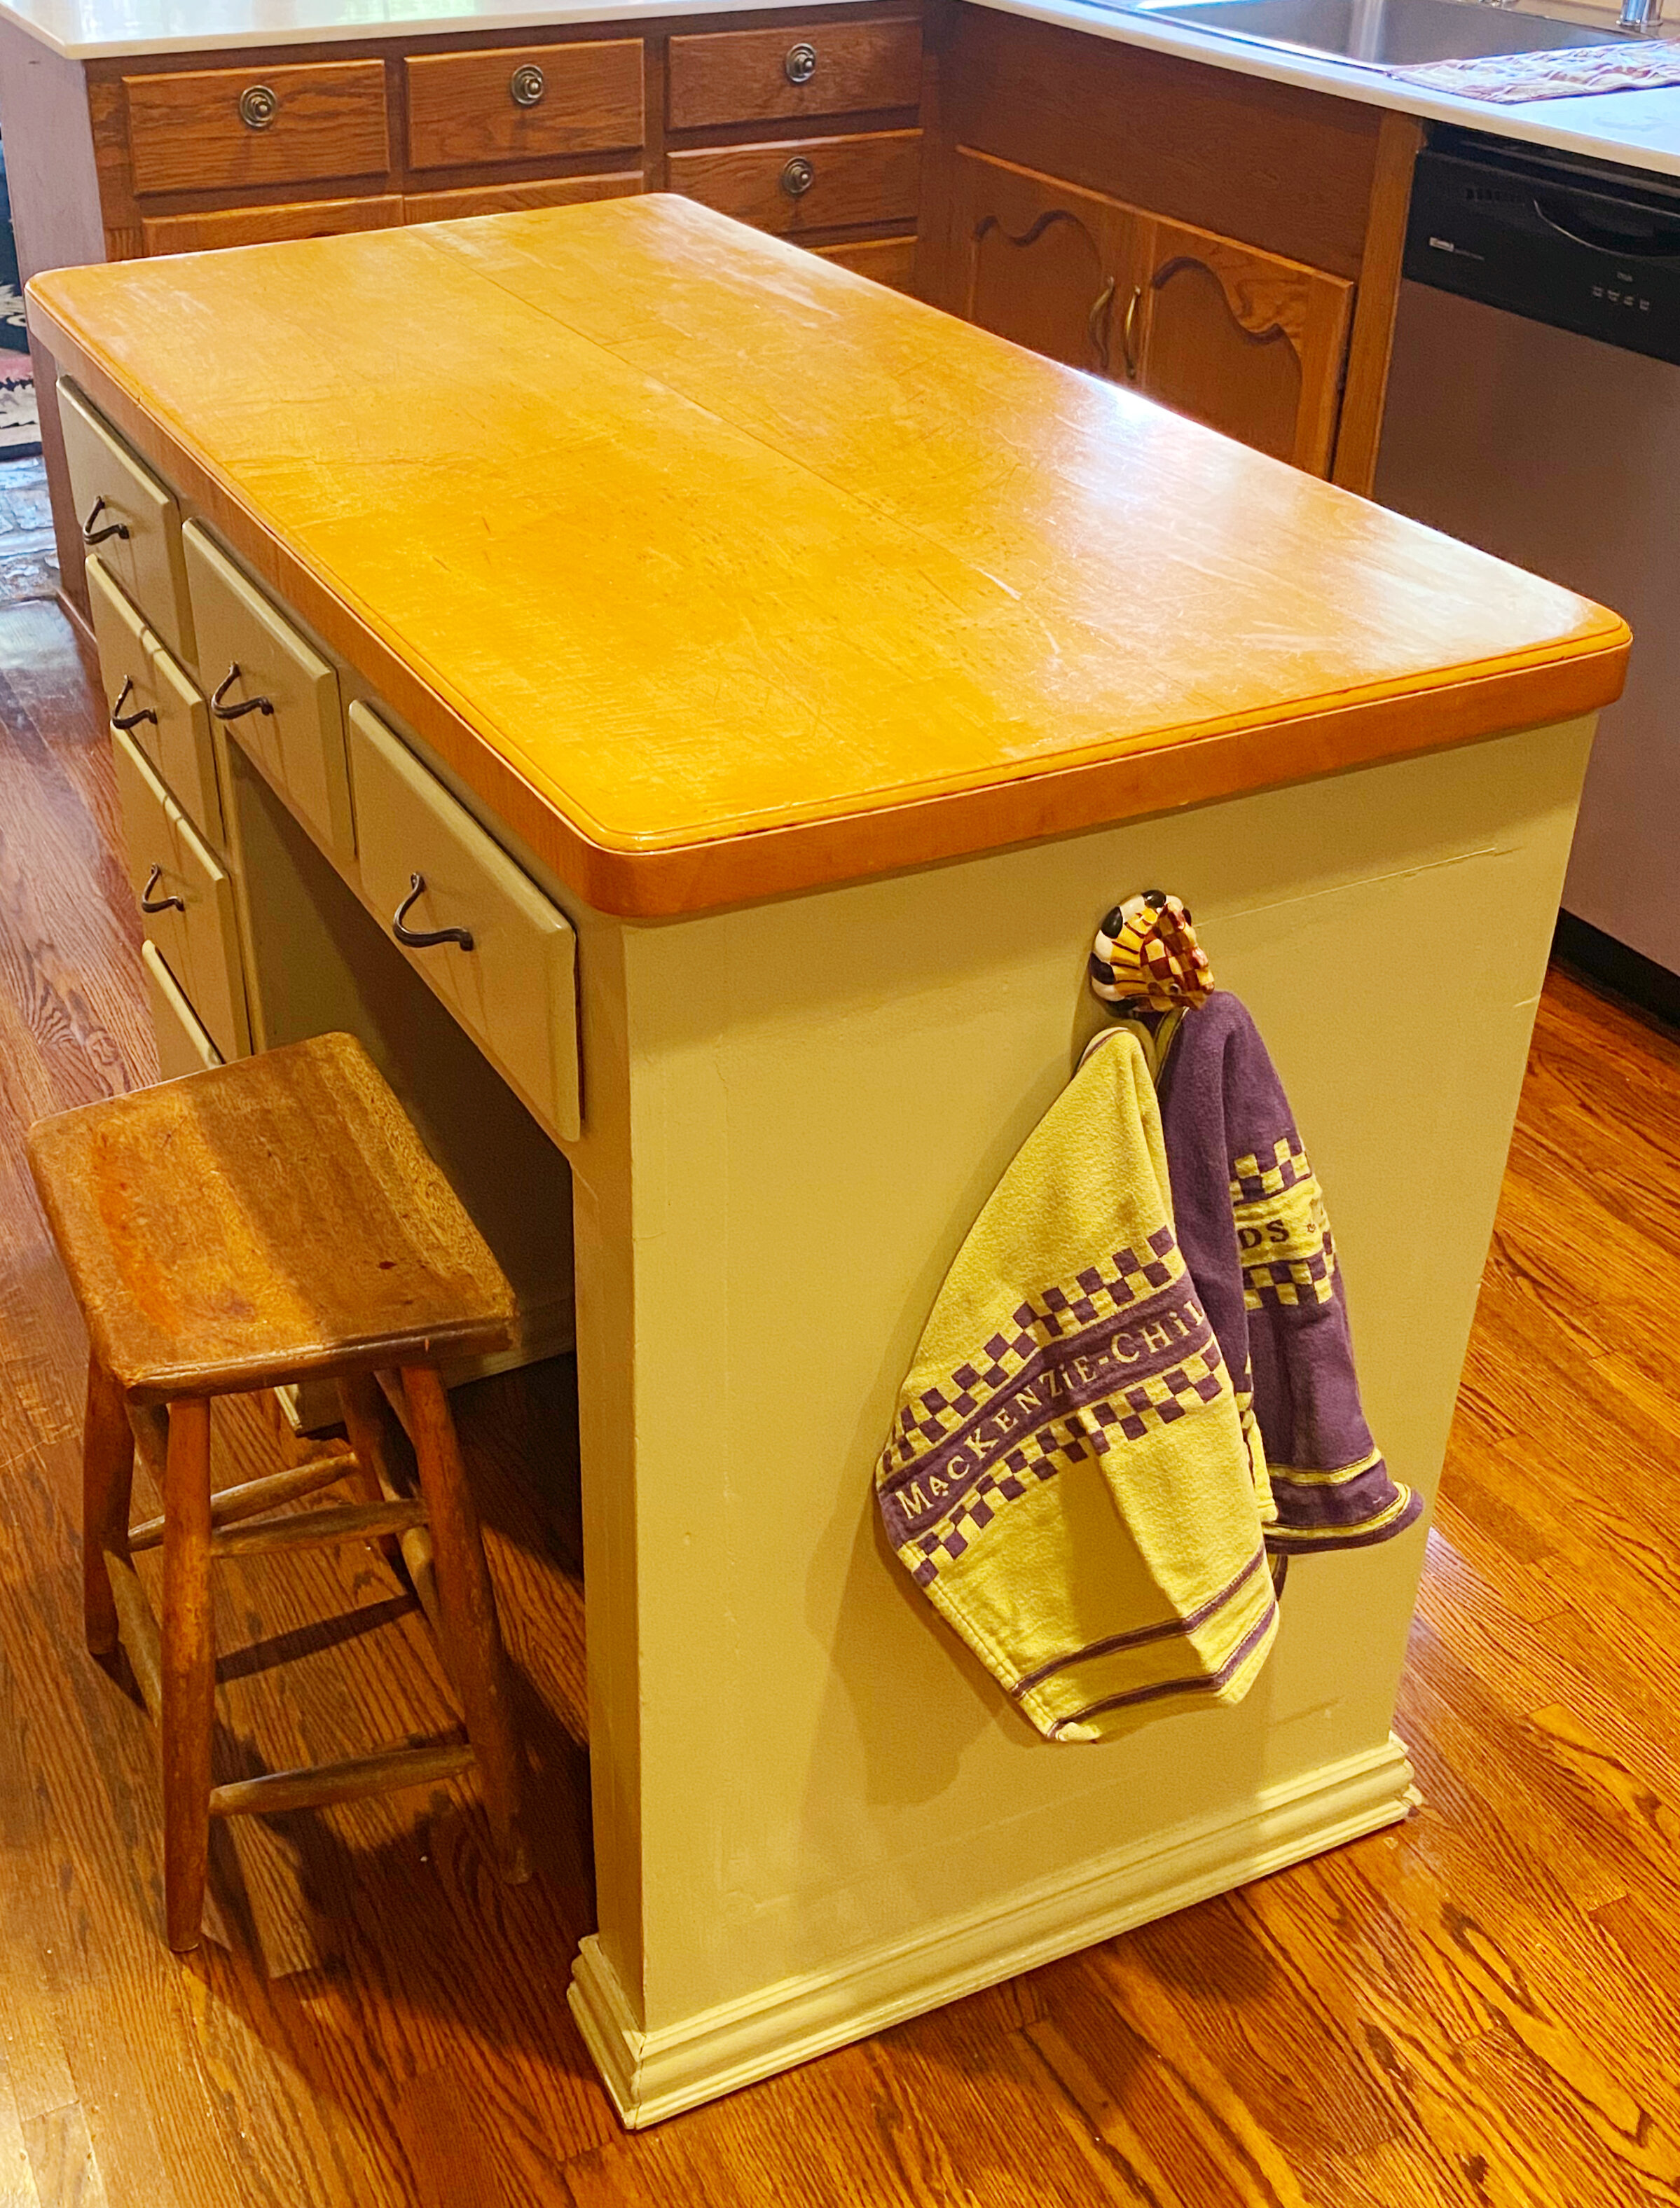
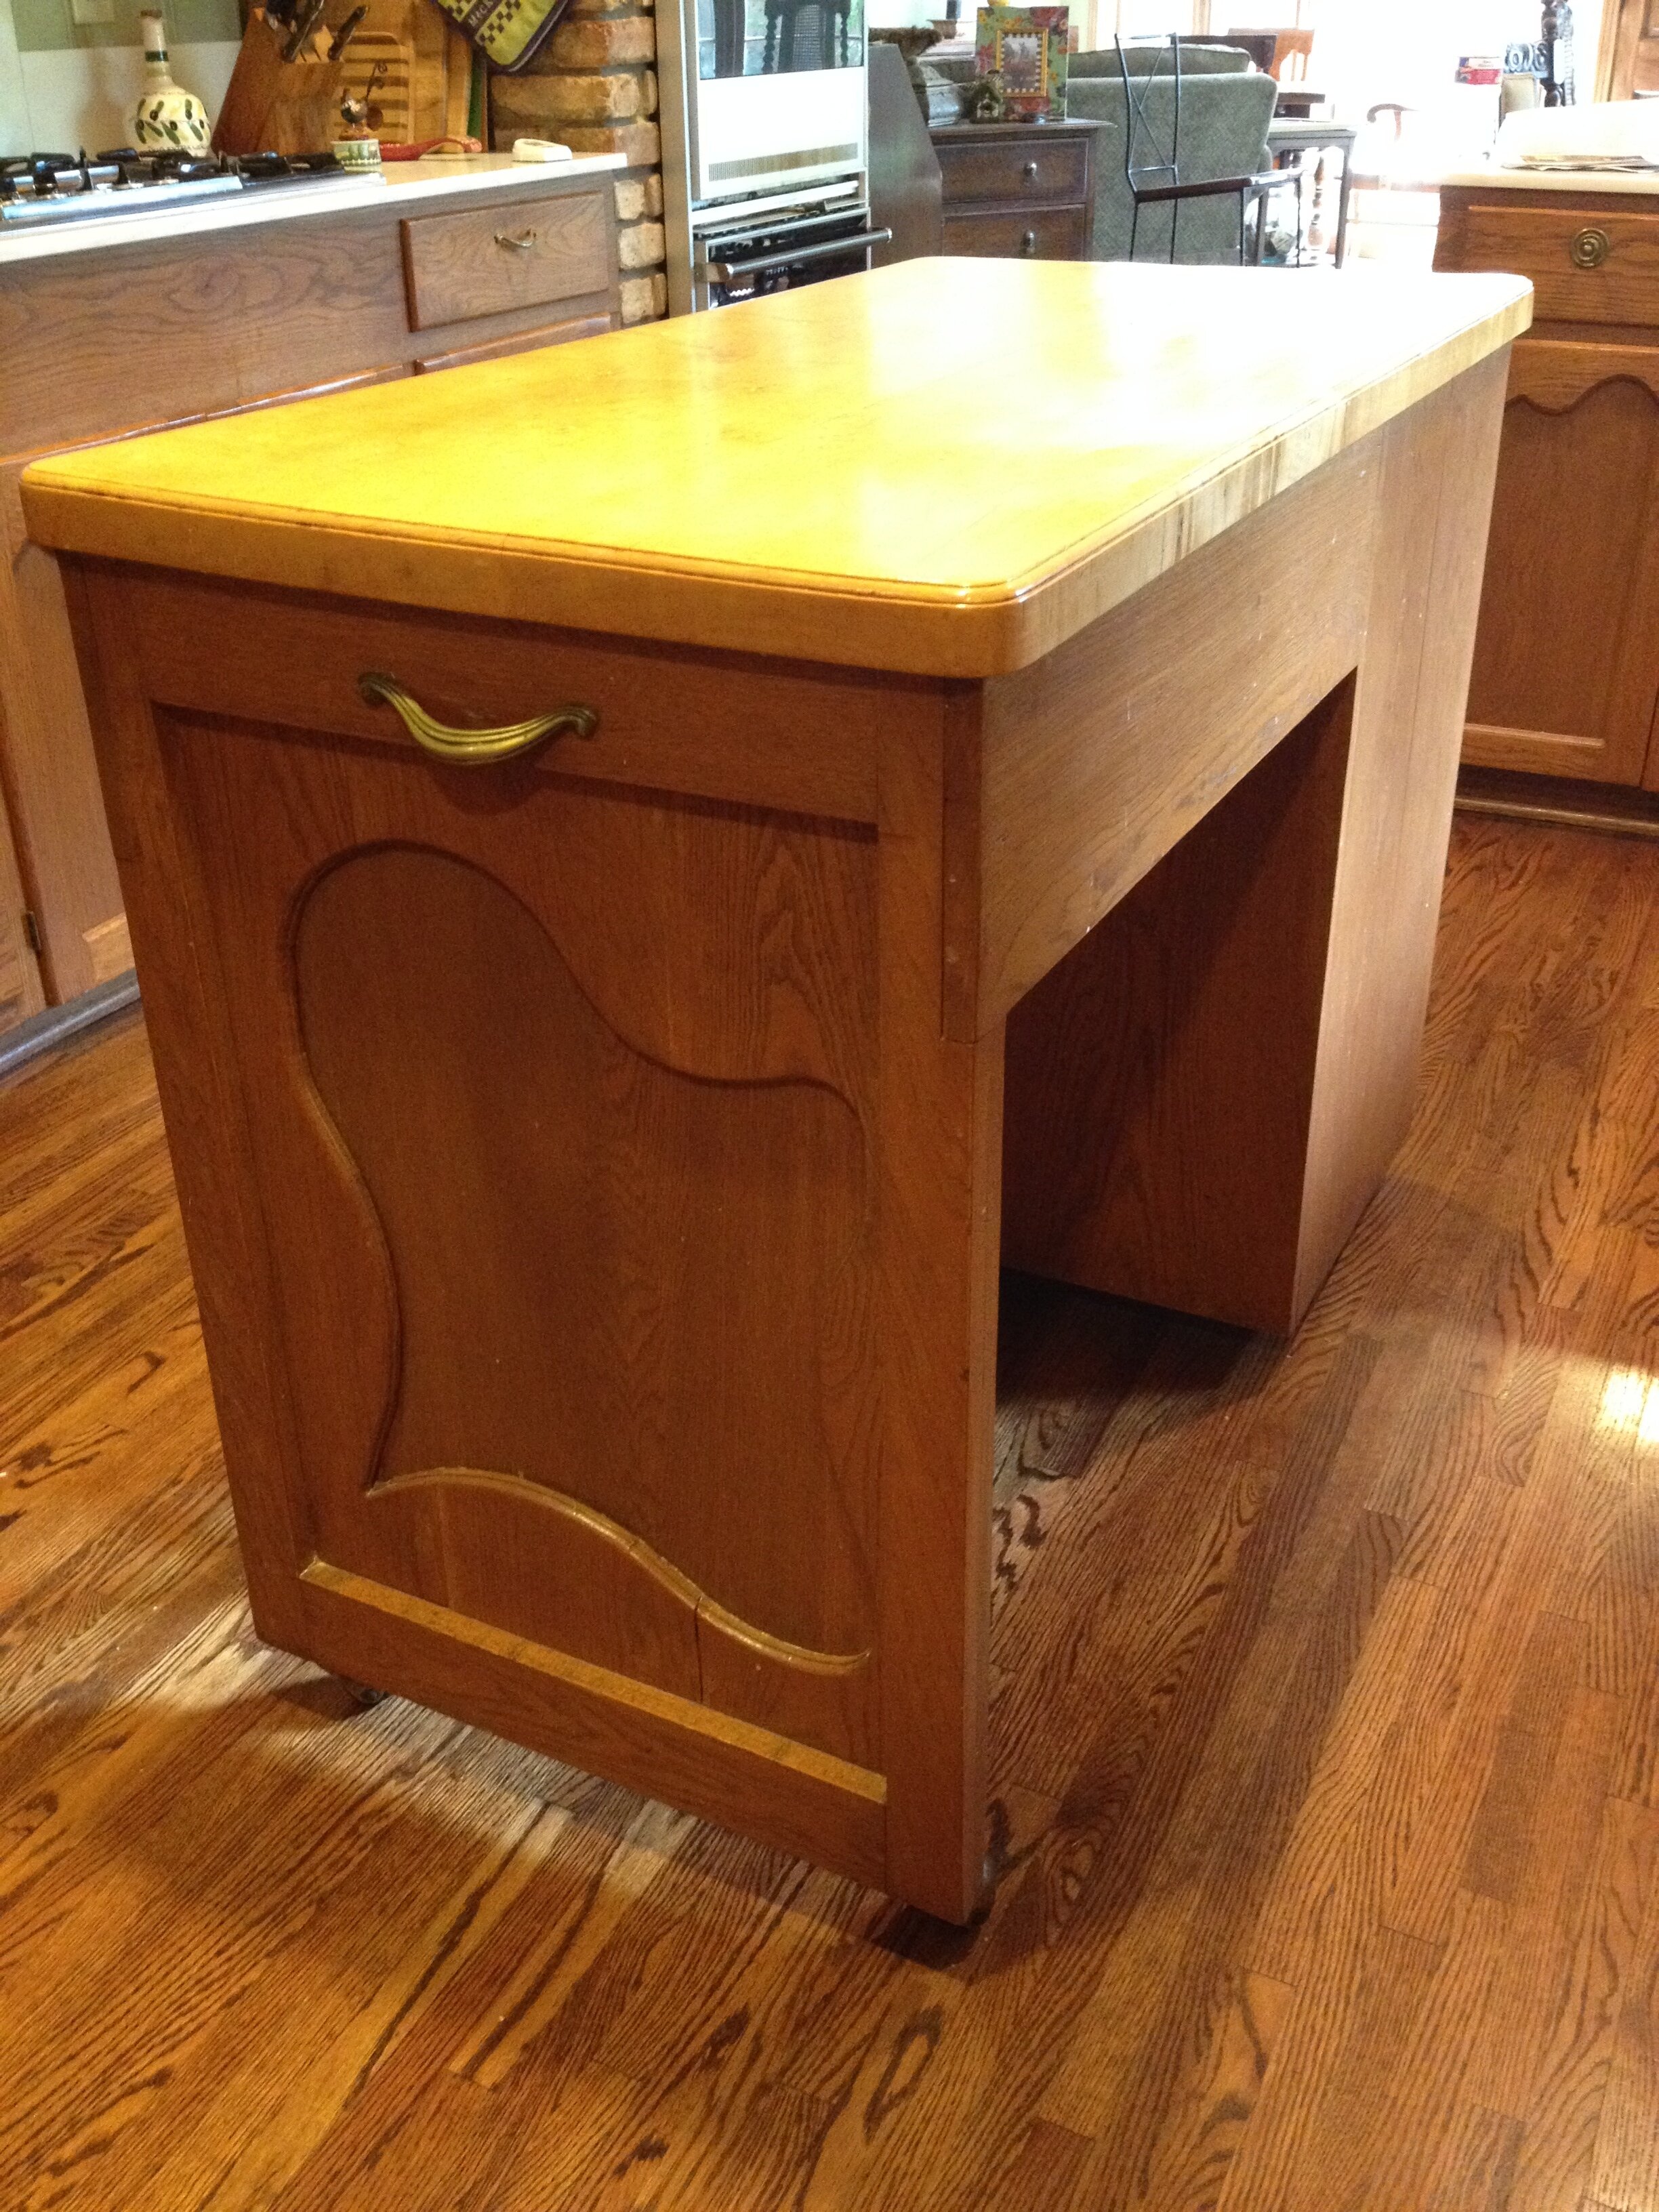
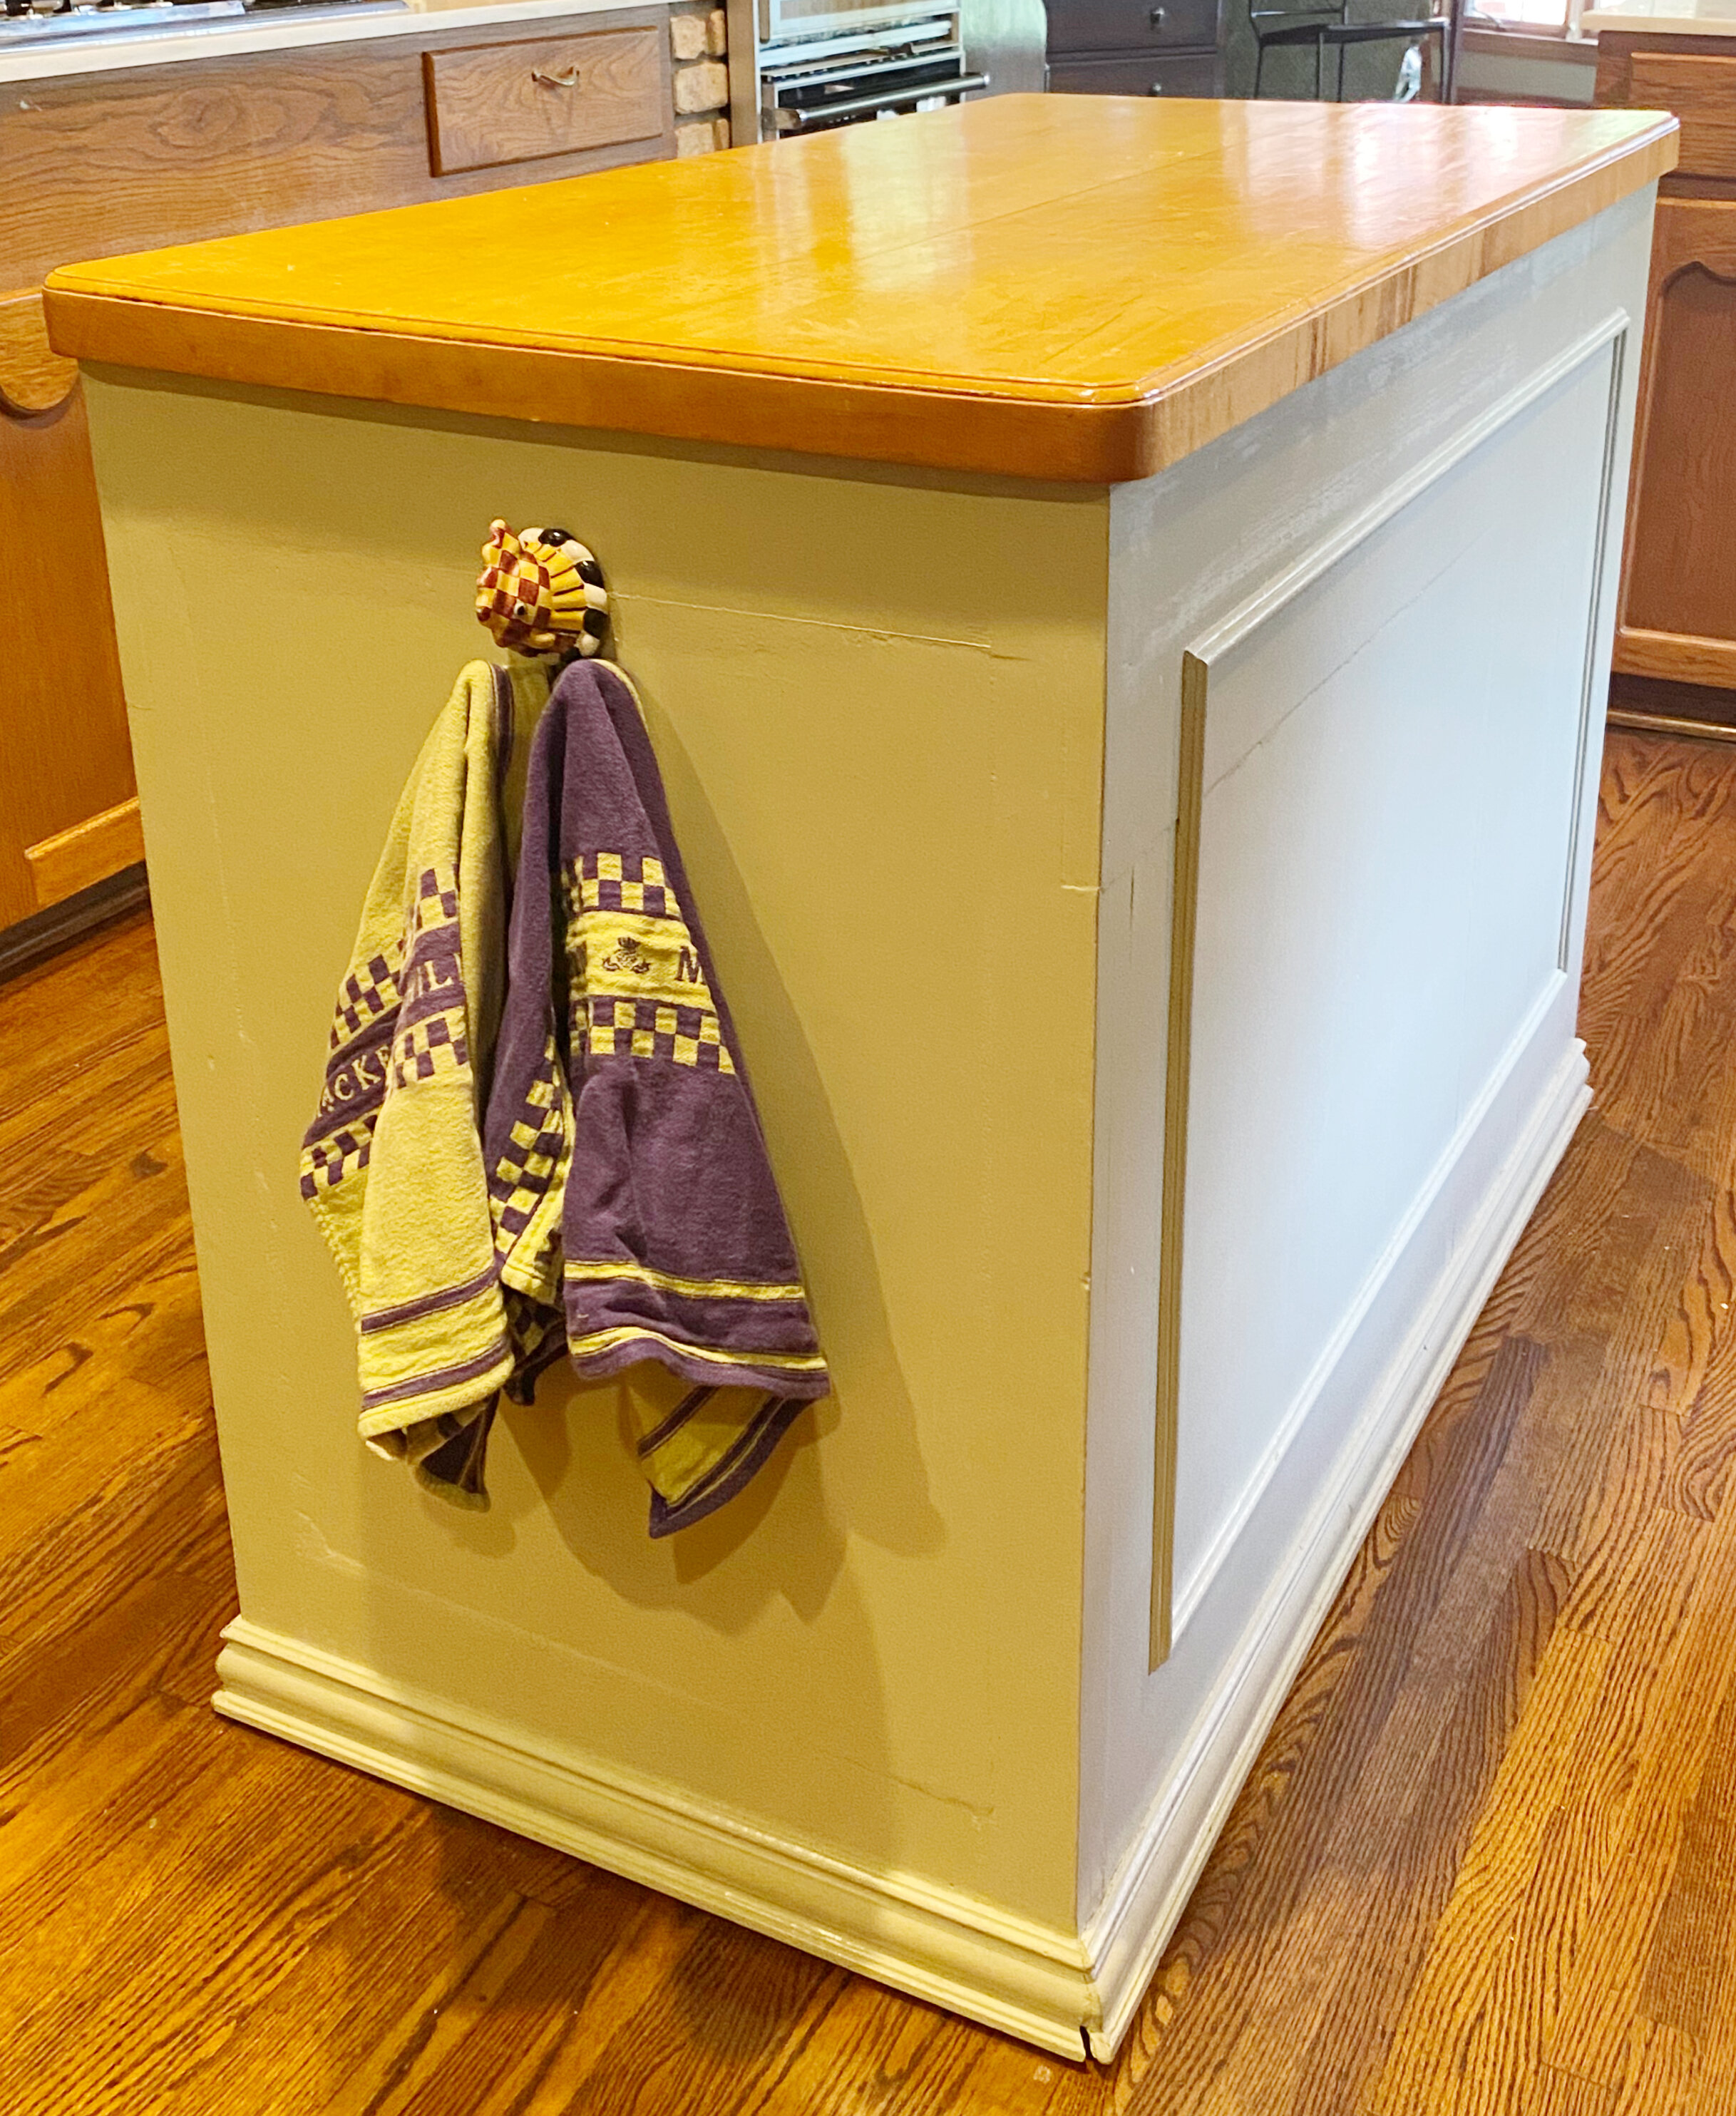
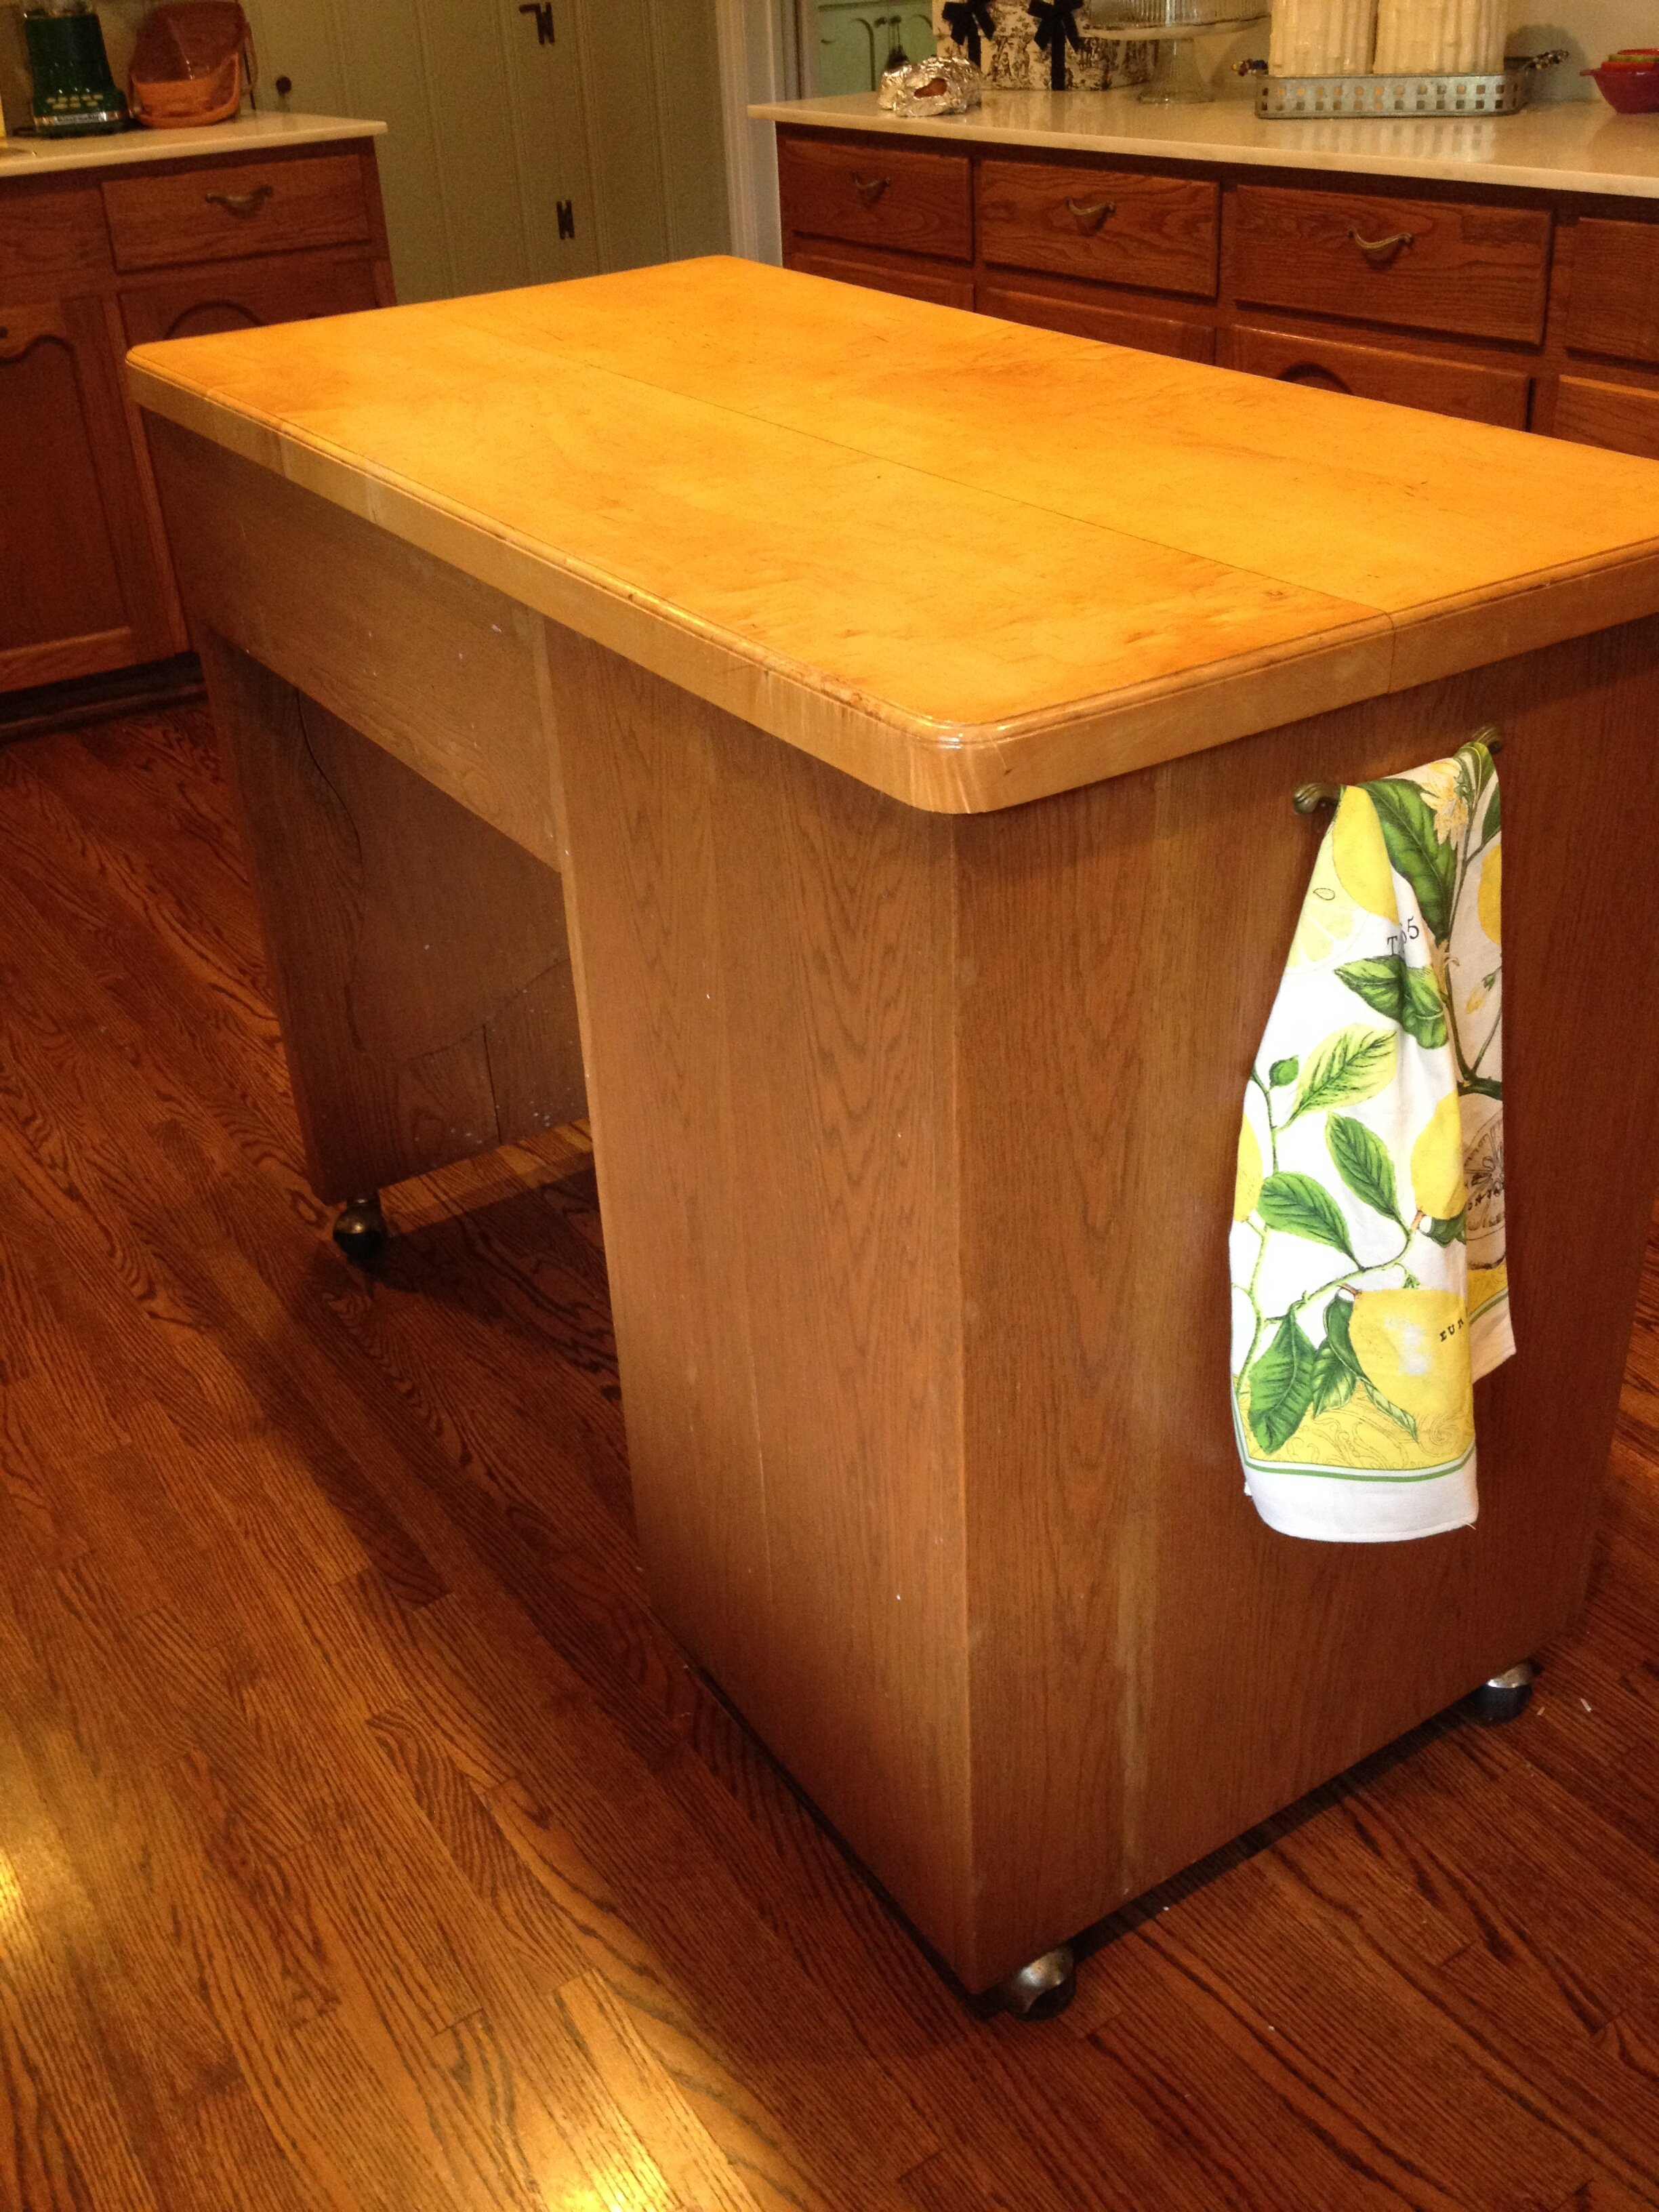
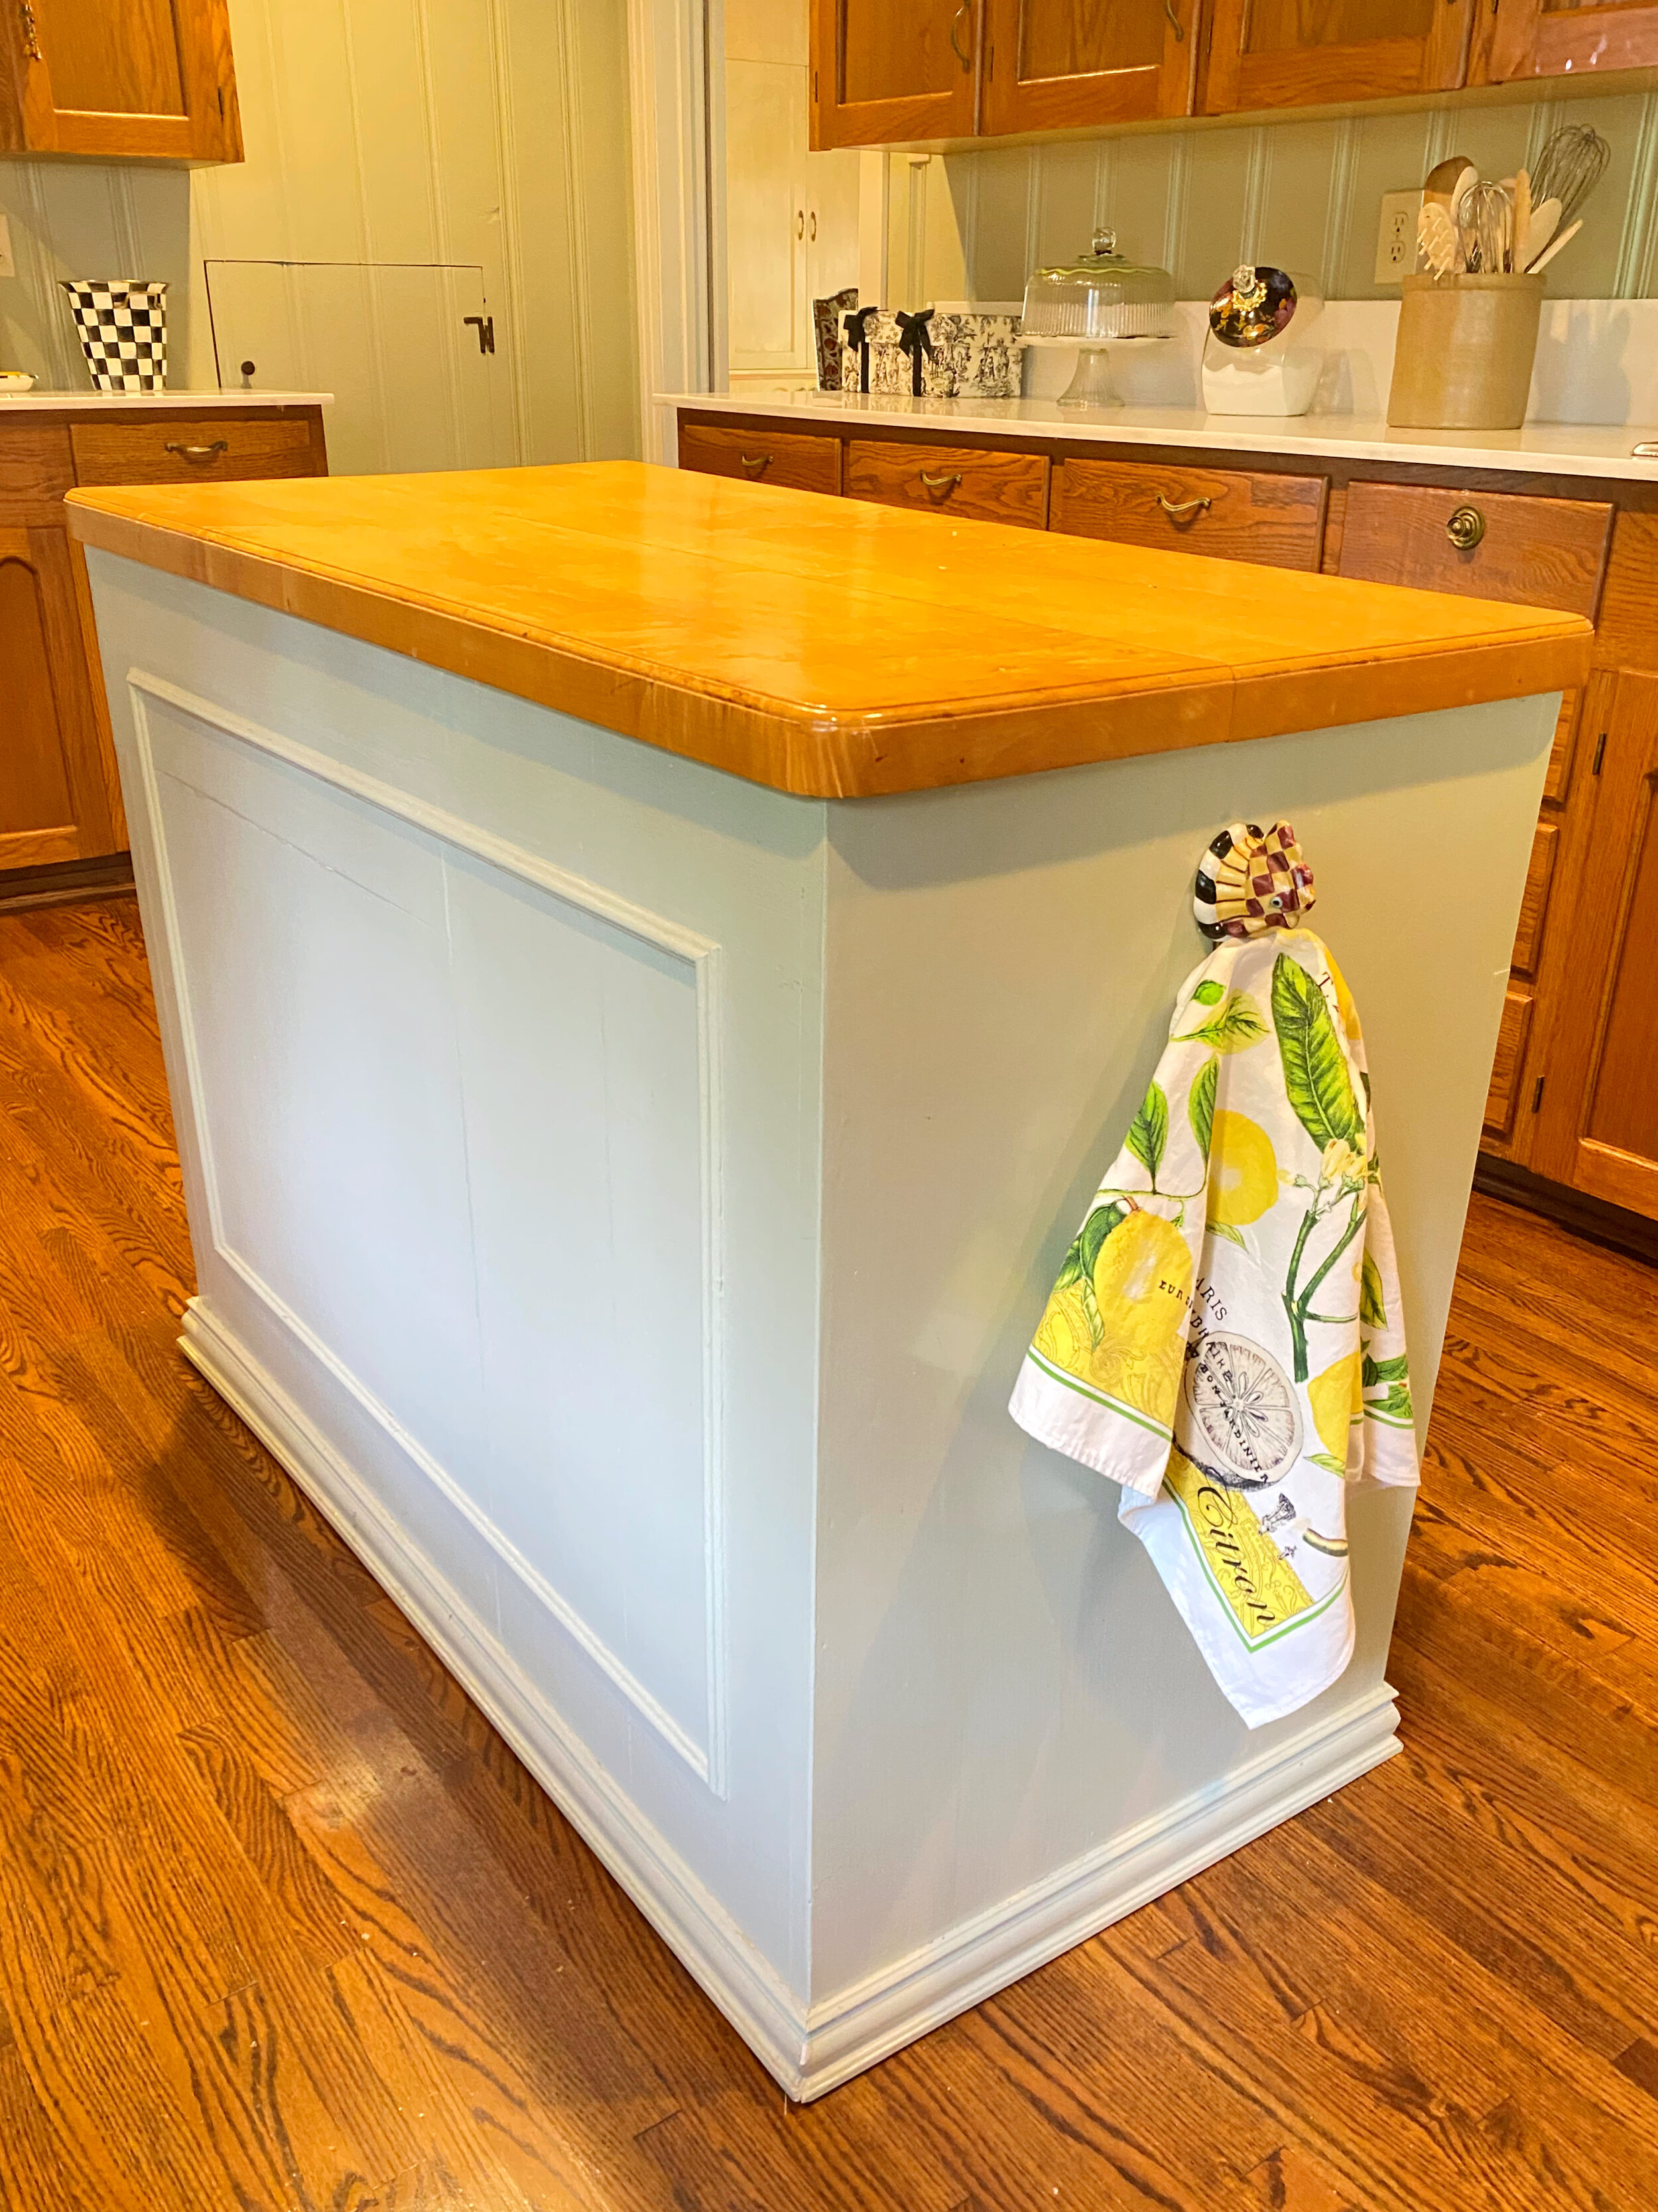
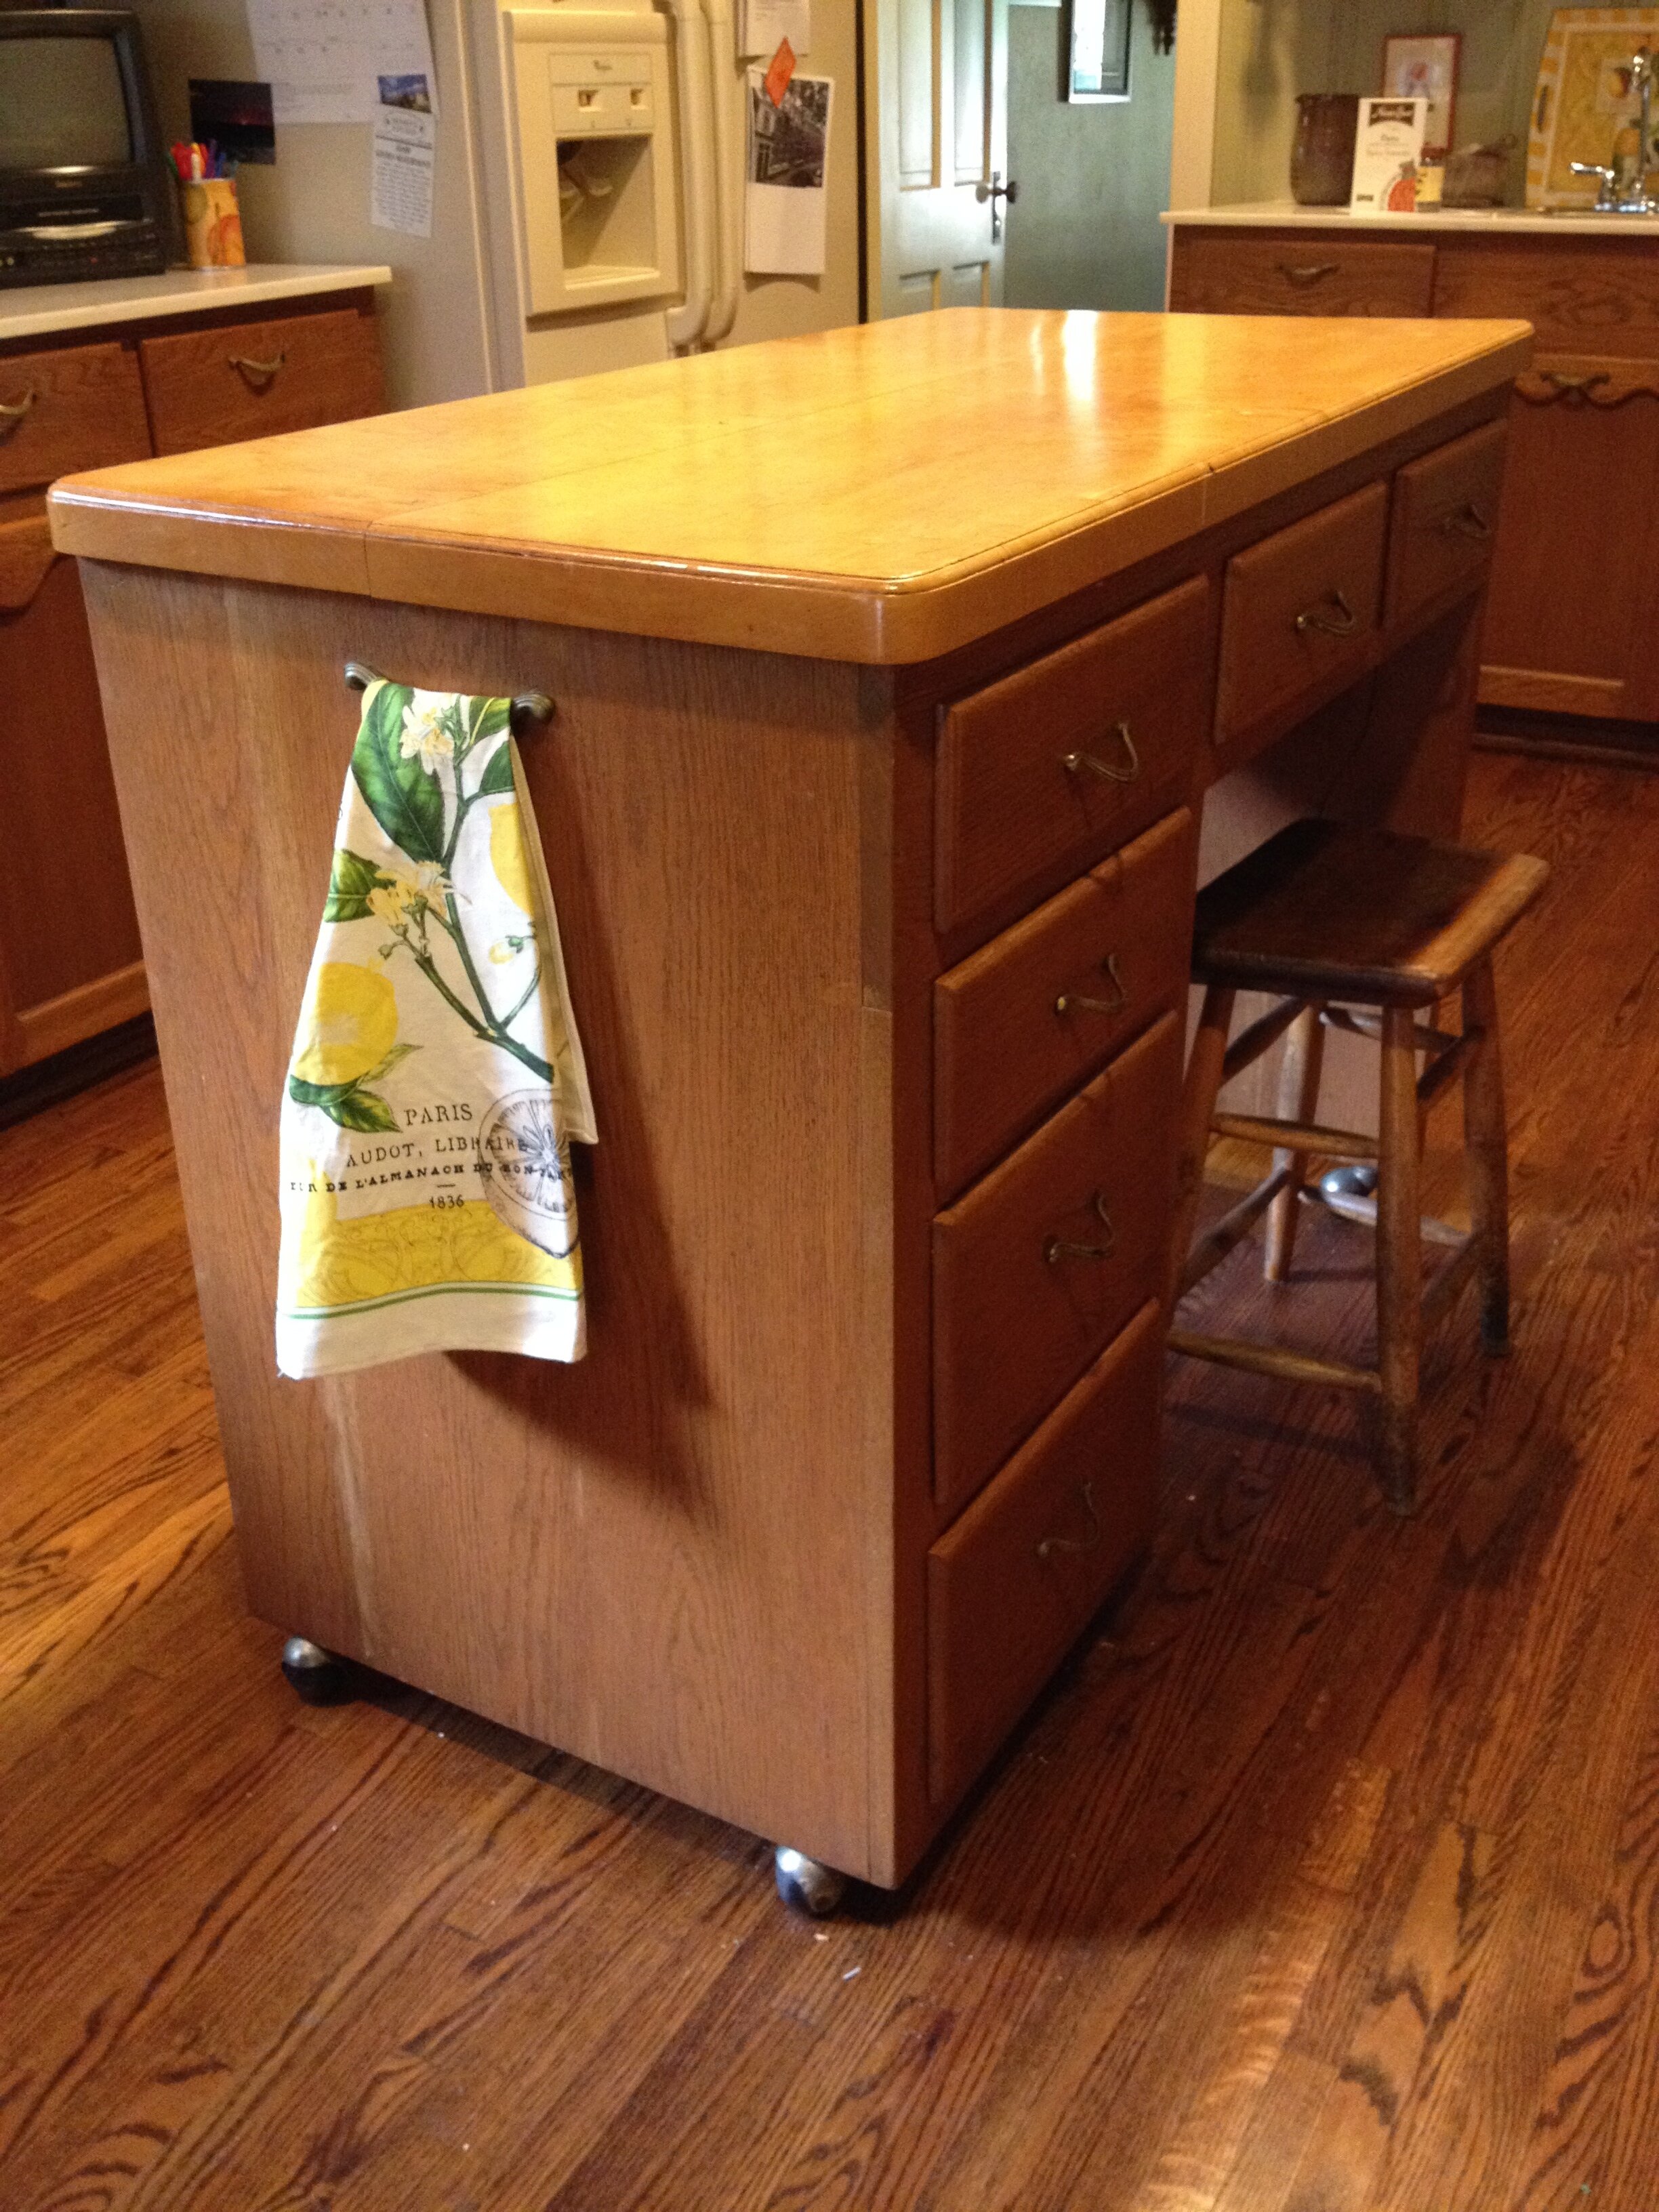
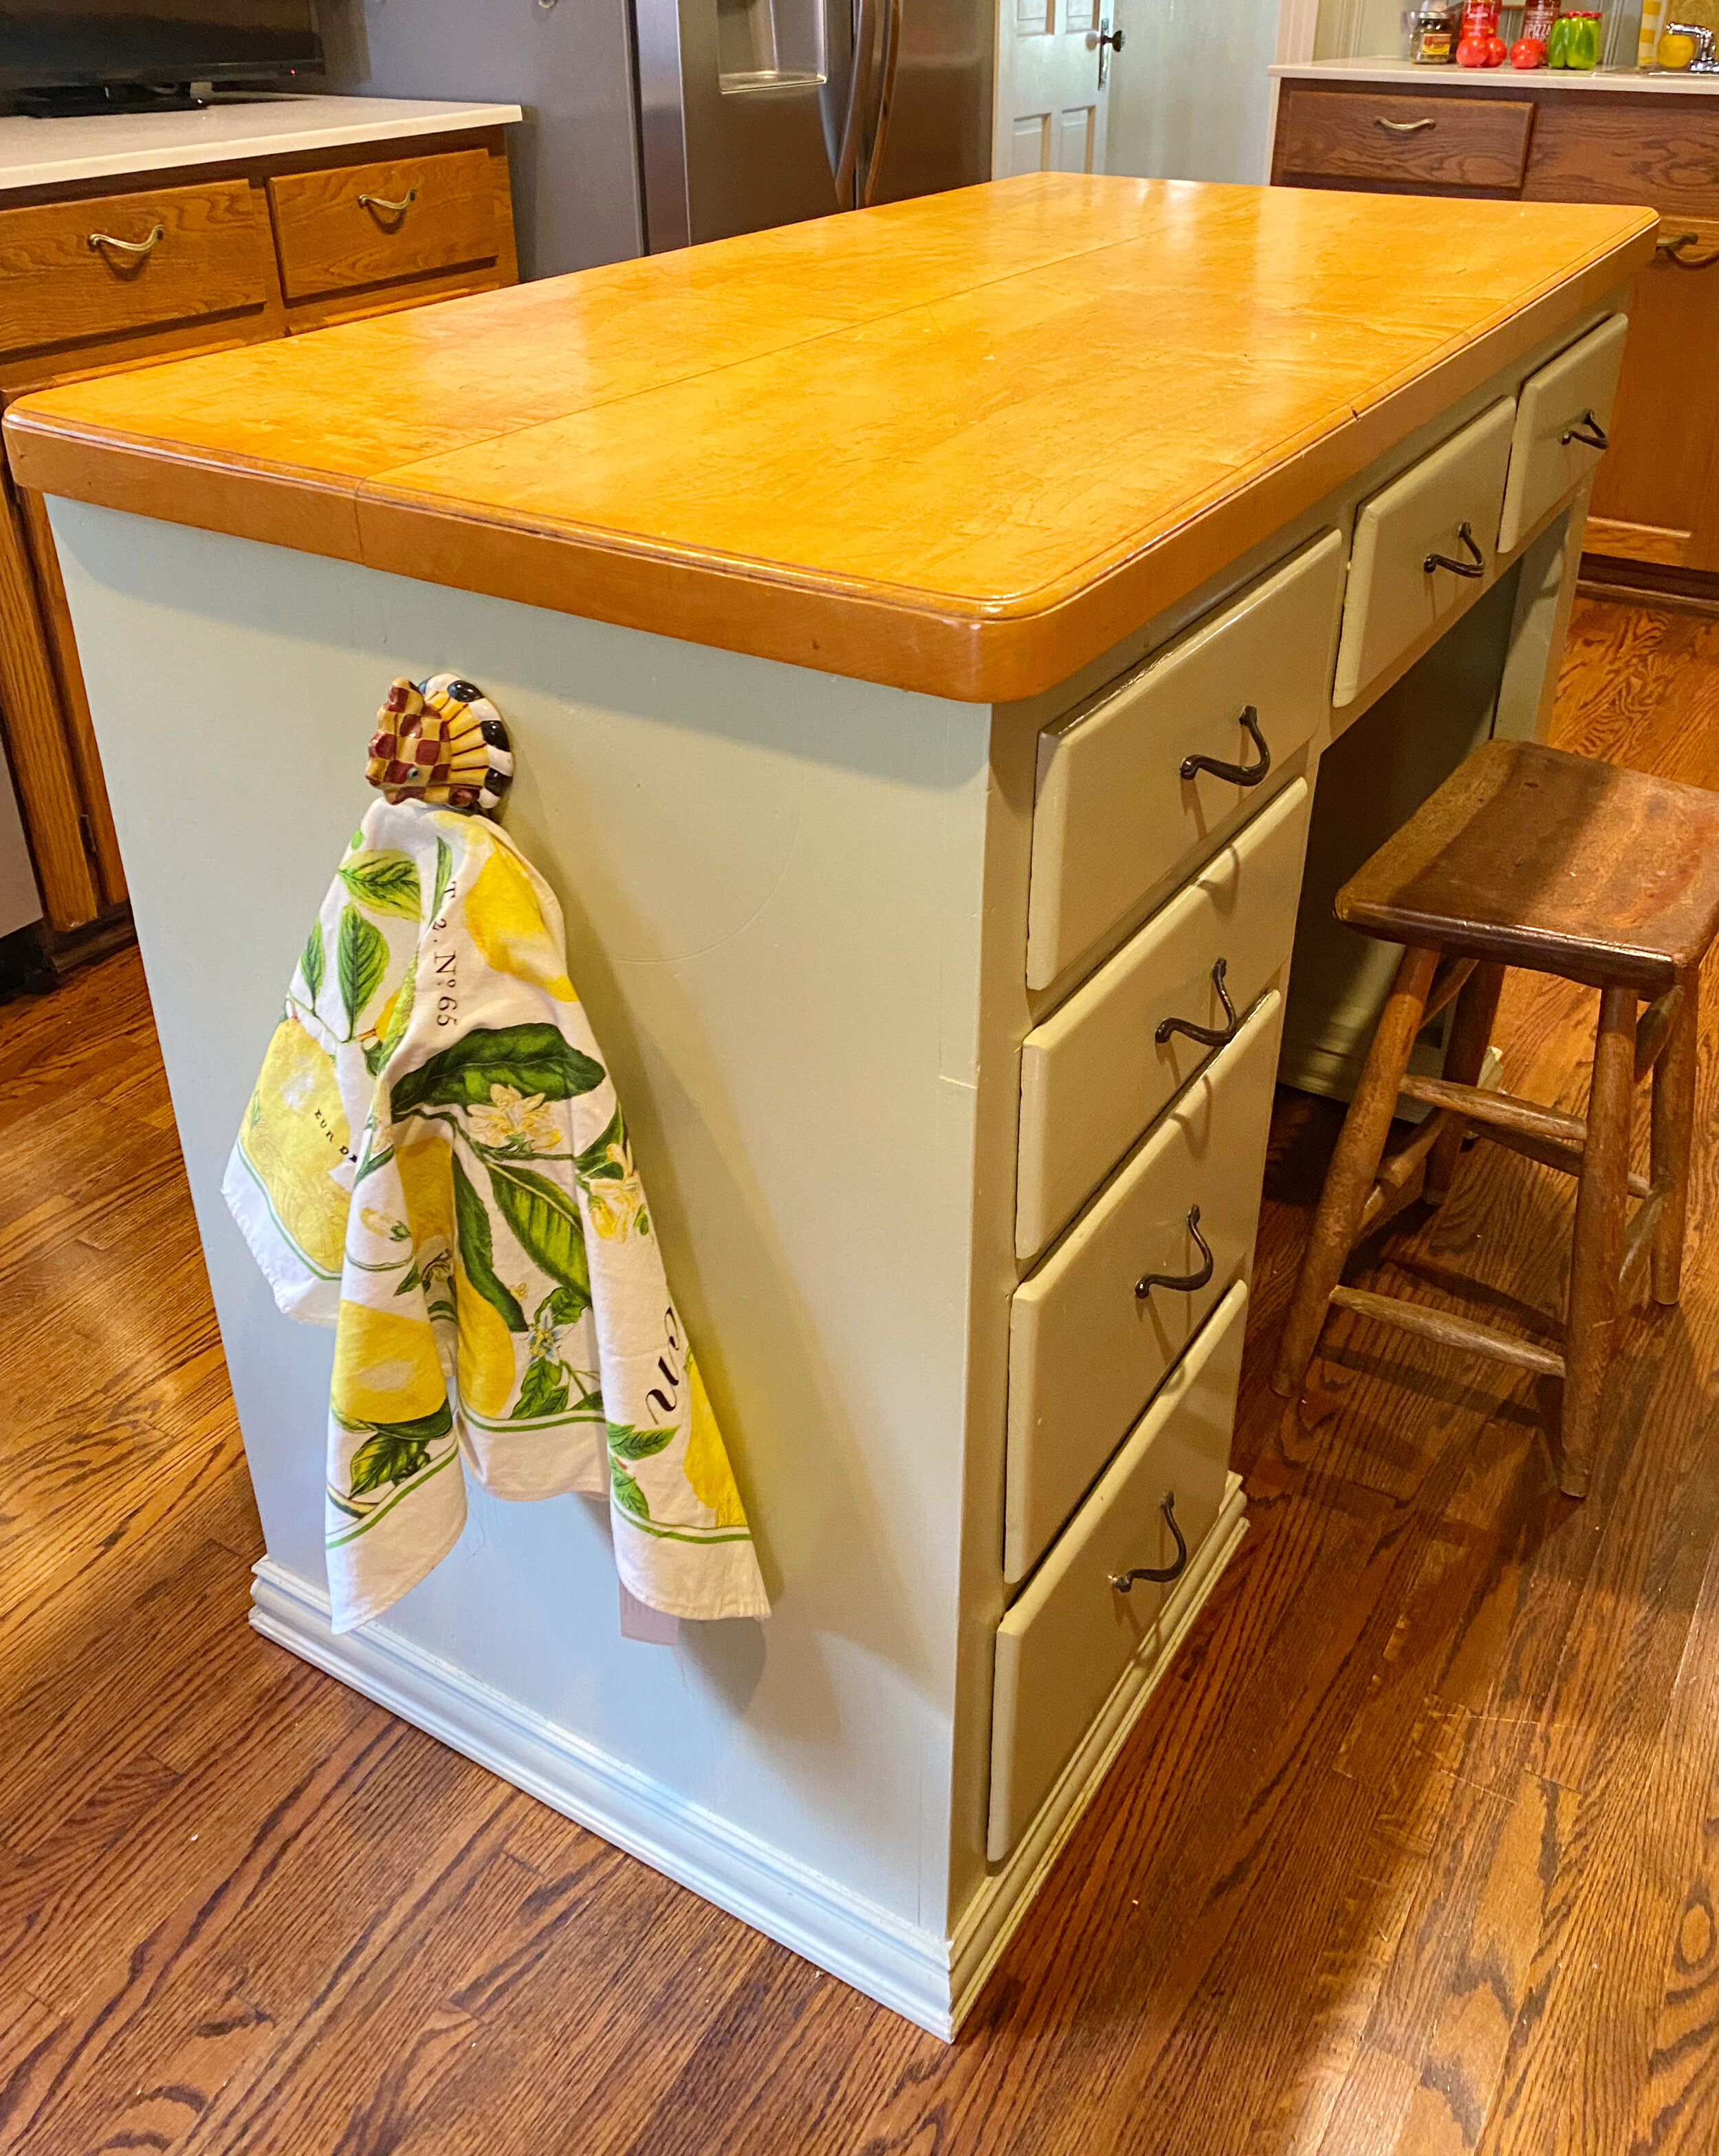
So finally you decide to tackle one small area of the kitchen - the kitchen island! Right? That’s what we did, too. I was always bothered by the cutouts on either end of the island and the indented side and the brass wheels on the bottom. So we figured out how to cover up the fancy designs with wood, added a baseboard along the bottom to make it seem like a more substantial piece of furniture and to cover up the wheels, painted it thyme green to match our wall color, added some cute Mackenzie-Childs towel hangers and some new hardware and VOILA! Except, as you remember, the holes in the drawer for the hardware were impossible to match up with any new hardware so that didn’t happen.